Install Stitch Payments on WooCommerce
Follow these steps to install and configure Stitch Payments on your WooCommerce store.
if you do not have a merchant account yet. Stitch sends the merchant ID and API credentials used below.
1. Install the plugin
- Upload
stitch-payments-for-woocommercetowp-content/plugins/, or install from your distribution package. - Ensure WooCommerce is installed and active.
- Activate Stitch Payments for WooCommerce from the WordPress Plugins screen.
Activation checks PHP version and WooCommerce availability. If a dependency is missing, the plugin will not activate.
2. Obtain credentials
Contact Stitch Payments to set up your merchant account and receive:
- Merchant ID (the numeric card merchant ID, not an ACH processor ID)
- API username and password
- Test (UAT) and production base URLs as applicable
The API host must be a CardPointe hostname. See CardPointe references for the UAT host, the tokenizer, and the public CardPointe guides.
3. Configure the gateway
Go to WooCommerce → Settings → Payments → Stitch.
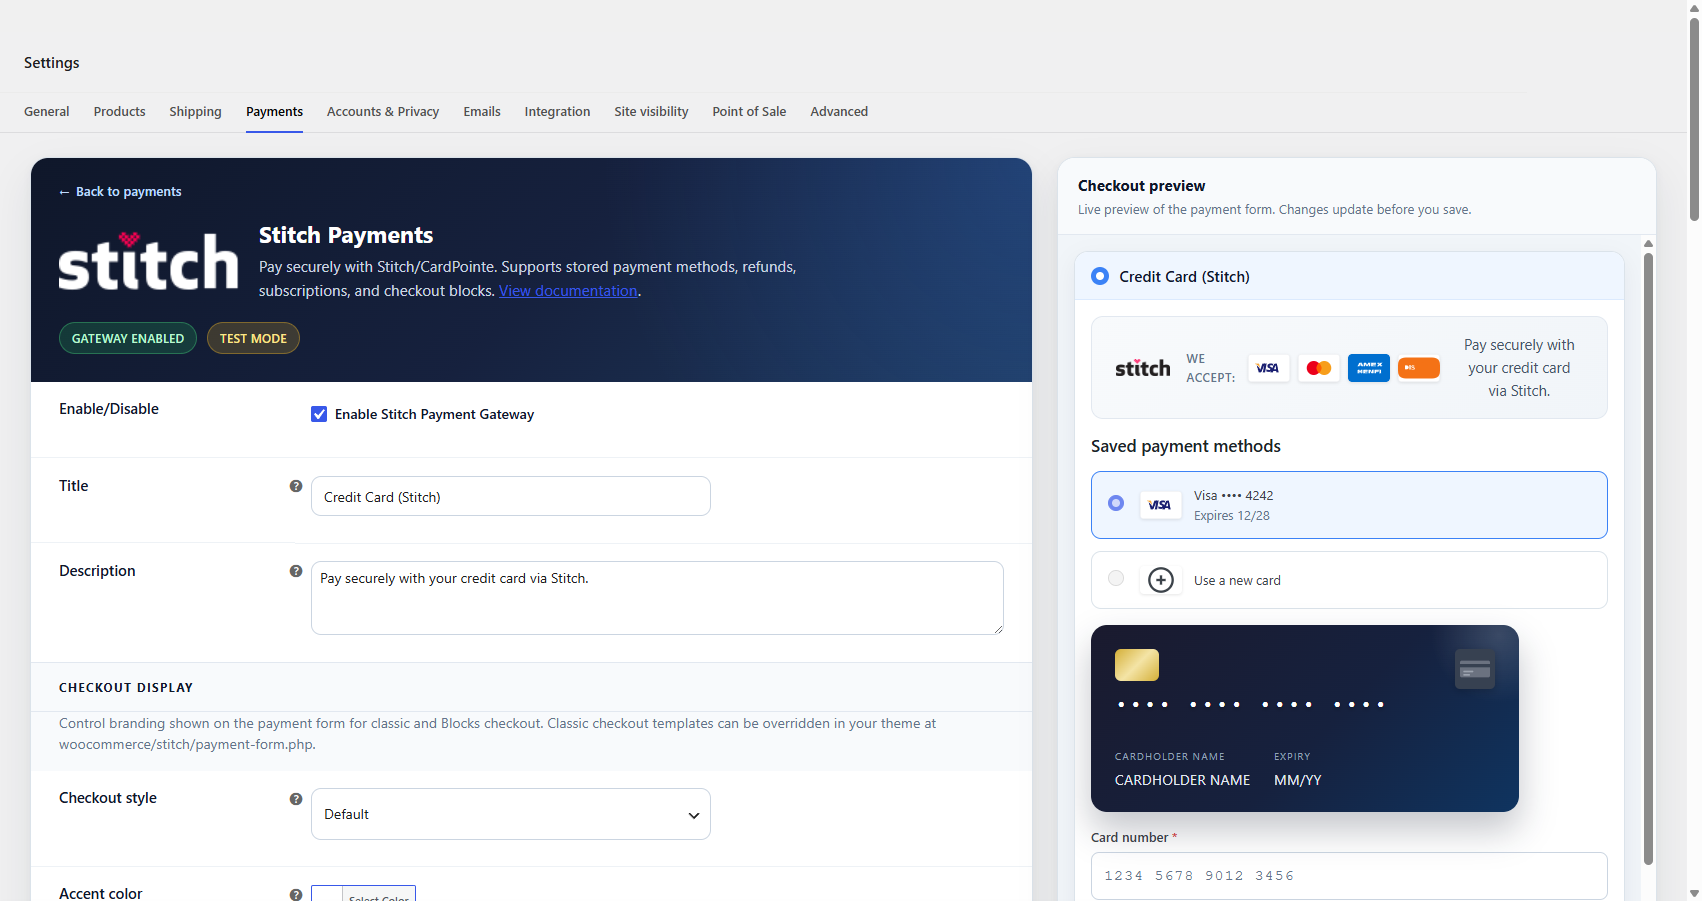
Enable the gateway
- Check Enable Stitch Payment Gateway.
- Set the Title and Description customers see at checkout.
:::info USD only The gateway processes payments in USD. If your store currency is set to anything else, Stitch is automatically hidden at checkout — check WooCommerce → Settings → General → Currency if the payment method does not appear. :::
API credentials
- Open the API Credentials section.
- Use the Test tab for UAT credentials and Production for live credentials.
- Enable Test Mode while testing — the active tab should match the environment you are using.
- Save changes. Credential validation runs on save.
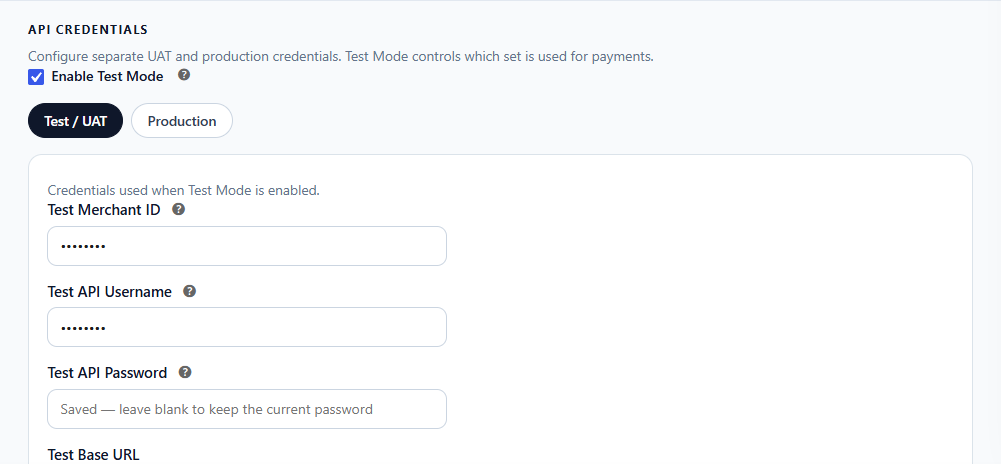
:::note Saved passwords For security, saved API passwords are not shown or pre-filled when you revisit the settings page. Leave a password field blank to keep the current password — only enter a value when you want to change it. :::
:::tip Keep credentials out of the database
Since 0.8.0 any credential can be defined in wp-config.php instead of the settings screen. A constant always wins over the saved value, so the API password never has to be stored in the database.
define( 'STITCH_PROD_MERCHANT_ID', 'your-merchant-id' );
define( 'STITCH_PROD_API_USERNAME', 'your-api-username' );
define( 'STITCH_PROD_API_PASSWORD', 'your-api-password' );
The name is STITCH_ plus the setting key in capitals: TEST_MERCHANT_ID, TEST_API_USERNAME, TEST_API_PASSWORD, TEST_BASE_URL, and the same four with PROD_, plus TEST_ACH_MERCHANT_ID and PROD_ACH_MERCHANT_ID for bank account payments. A field supplied by a constant is disabled on the settings screen and shows which constant sets it.
:::
:::note Base URL overrides
The optional test/production base URL fields only accept CardPointe hosts (cardconnect.com / cardpointe.com), entered as a bare hostname such as fts-uat.cardconnect.com. Anything else is ignored and the default endpoint is used, so your API credentials can never be sent to the wrong host by a typo. White-label hosts can be allowed by a developer via the stitch_payments_allowed_api_hosts filter.
:::
Checkout display (optional)
Use the Checkout display section and the live preview on the right to tune the form: pick a Checkout style preset (Default, Minimal, Compact, or Dark), optionally set an Accent color or Custom checkout CSS, and adjust branding (logo, card icons, description, card preview, custom logo URL, field labels). The preview restyles as you type. See Checkout display.
Other settings
Under Other settings you can enable stored payment methods, choose whether to charge immediately or authorize only (see Authorize and capture), send Level 2 / 3 commercial data, set address check (AVS) and CVV no-match actions, enable surcharge disclosure, and turn on Debug log (successful API calls; failures are always logged) or enhanced debug logging.
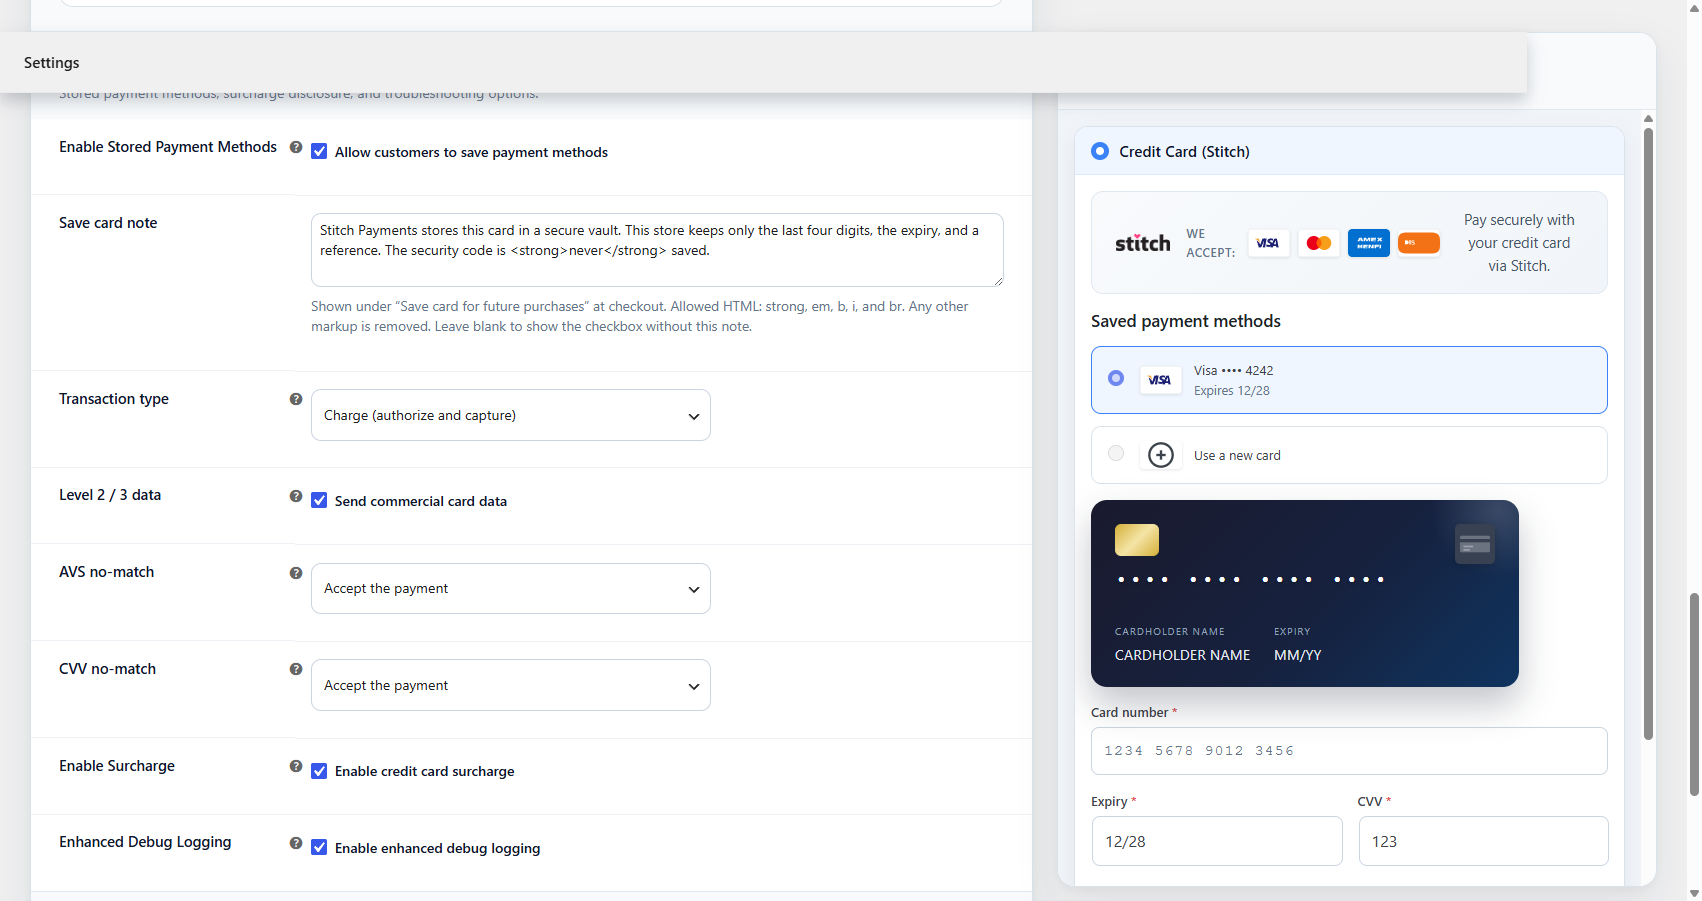
Stored payments and surcharge are documented in their own guides. Enhanced debug logging adds customer details (email, name, postal code) to payment log entries — keep it off in production unless support asks for it.
Data retention
Scroll to Data Retention to review what the plugin stores and optionally enable removal of plugin data on uninstall. Use the in-settings summary when updating your privacy policy — details in Data and privacy.
4. Test checkout
Test card numbers
Use these while Test Mode is on. Any future expiry is accepted, such as 12/28. Any security code is accepted: 3 digits, or 4 digits for American Express.
| Brand | Card number | Expiry | Security code |
|---|---|---|---|
| Visa | 4788250000121443 | Any future date, such as 12/28 | Any 3 digits, such as 123 |
| Mastercard | 5454545454545454 | Any future date, such as 12/28 | Any 3 digits, such as 123 |
| American Express | 371449635398431 | Any future date, such as 12/28 | Any 4 digits, such as 1234 |
A 16-digit Visa number that passes the Luhn check, such as 4111111111111111, is also approved in UAT. These numbers are from the CardPointe UAT guide. Test numbers are declined in production.
- Keep Test Mode enabled.
- Place a test order on classic checkout and, if used, Blocks checkout.
- Pay with a card number from the table above.
- A successful charge moves the order to Processing. The order note reads Stitch payment successful, followed by the transaction reference and auth code. The Stitch box on the order shows the same transaction reference.
- Test a guest checkout with a new card, and a logged-in checkout with a saved card if Enable Stored Payment Methods is on.
- If Transaction type is Authorize only, the order stays On hold and the note says the payment is authorized and not yet captured. Move one order to Processing or Completed to capture it, and cancel another to void the hold.
5. Go live
- Enter production credentials in the Production tab.
- Disable Test Mode.
- Save and place a small live transaction to confirm end-to-end flow.
Where to get help
- Stitch Payments — stitchpayments.net
- Technical customization — Customization or your agency
- Plugin built by — MindK